Overview
TyTools is a collection of independent tools to manage, flash and communicate with Teensy microcontrollers.
| Tool | Type | Description |
|---|---|---|
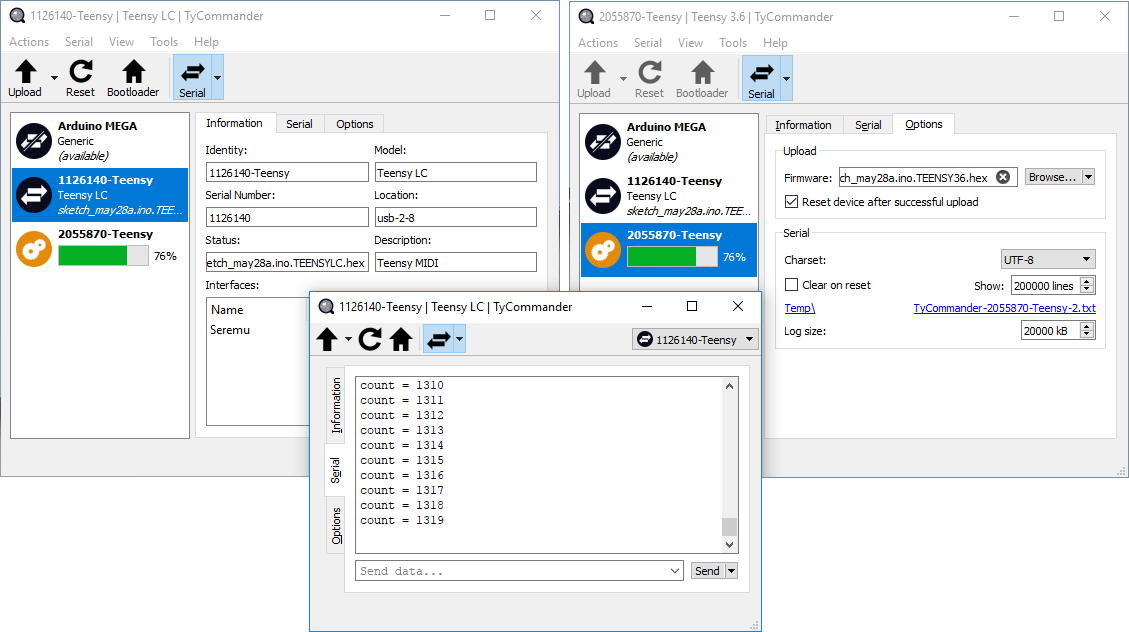
| TyCommander | Qt GUI (static) | Upload, monitor and communicate with multiple boards |
| TyUploader | Qt GUI (static) | Simple firmware / sketch uploader |
| tycmd | Command-line No Qt ! |
Command-line tool to manage Teensy boards |
Each tool is independent and you only need the one executable to use it. The Qt-based GUI tools are statically compiled to make that possible.
Install
Windows
Download ready-to-use binaries here: https://download.koromix.dev/releases/tytools/windows/
macOS
Download ready-to-use binaries here: https://download.koromix.dev/releases/tytools/macos/
Linux (Debian)
A signed Debian repository is provided, and should work with Debian 12 and Ubuntu 22.04 (and later versions).
Execute the following commands (as root) to add the repository to your system:
mkdir -p -m0755 /etc/apt/keyrings

curl https://download.koromix.dev/debian/koromix-archive-keyring.gpg -o /etc/apt/keyrings/koromix-archive-keyring.gpg
echo "deb [signed-by=/etc/apt/keyrings/koromix-archive-keyring.gpg] https://download.koromix.dev/debian stable main" > /etc/apt/sources.list.d/koromix.dev-stable.list
Once this is done, refresh the repository cache and install the package:
apt update
apt install tytools
For other distributions, you can build the code from source as documented on the website.
Linux (RPM)
A signed RPM repository is provided, and should work with Fedora 38+.
Execute the following commands (as root) to add the repository to your system:
curl https://download.koromix.dev/rpm/koromix-repo.asc -o /etc/pki/rpm-gpg/koromix-repo.asc

echo "[koromix]
name=koromix repository
baseurl=https://download.koromix.dev/rpm
enabled=1
gpgcheck=1
repo_gpgcheck=1
gpgkey=file:///etc/pki/rpm-gpg/koromix-repo.asc" > /etc/yum.repos.d/koromix.repo
Once this is done, install the package with this command:
dnf install tytools
For other distributions, you can build the code from source as documented below.
Using tycmd
You can manage multiple devices connected simultaneously, tycmd (and the other tools) uniquely identifies each device by its position in the host USB topology. Meaning if it stays on the same USB port, it is handled as the same device. That's necessary because across reboots and resets, Teensies look completely different to the host.
To target a specific device, use option --board "[serial][-family][@location]". serial is the USB serial number, family is the board family name and location can be the virtual path computed by tycmd (see tycmd list) or an OS device path (e.g. /dev/hidraw1 or COM1). Any of them can be omitted. See the examples in the table below.
| Tag filter | Effect |
|---|---|
| 714230 | Select board with serial number 714230 |
| -Teensy | Select board with family name 'Teensy' |
| @usb-1-2-2 | Select board plugged in USB port 'usb-1-2-2' |
| @COM1 | Select board linked to the OS-specific device 'COM1' |
| 714230@usb-1-2-2 | Select board plugged in 'usb-1-2-2' and with serial number is 714230 |
You can learn about the various commands using tycmd help. Get specific help for them using tycmd help <command>.
List devices
tycmd list lists plugged Teensy devices. Here is how it looks:
add 34130@usb-1-2 Teensy 3.1
add 29460@usb-4-2 Teensy
add 32250@usb-4-3 Teensy 3.0
Use --verbose if you want detailed information about available devices:
add 32250@usb-4-3 Teensy 3.0
  + capabilities:
    - upload
    - reset
  + interfaces:
    - HalfKay Bootloader: /dev/hidraw2
If you need to read structured information in your scripts, you can set the output to JSON with --output json:
{"action": "add", "tag": "714230@usb-6-3", "serial": 714230, "location": "usb-6-3", "model": "Teensy", "capabilities": ["reboot", "serial"], "interfaces": [["Seremu", "/dev/hidraw4"]]}
{"action": "add", "tag": "1126140@usb-6-2", "serial": 1126140, "location": "usb-6-2", "model": "Teensy LC", "capabilities": ["upload", "reset"], "interfaces": [["HalfKay Bootloader", "/dev/hidraw3"]]}
You can also watch device changes with --watch, both in plain and JSON mode.
| Action | Meaning |
|---|---|
| add | This board was plugged in or was already there |
| change | Something changed, maybe the board rebooted |
| miss | This board is missing, either it was unplugged (remove) or it is changing mode |
| remove | This board has been missing for some time, consider it removed |
Upload firmware
Use tycmd upload <filename.hex> to upload a specific firmware to your device. It is checked for compatibility with your model before being uploaded.
By default, a reboot is triggered but you can use --wait to wait for the bootloader to show up, meaning tycmd will wait for you to press the button on your board.
Serial monitor
tycmd monitor opens a text connection with your Teensy. It is either done through the serial device (/dev/ttyACM*) or through the HID serial emulation (SEREMU) in other USB modes. tycmd uses the correct mode automatically.
You can use the --reconnect option to detect I/O errors (such as a reset, or after a brief unplugging) and reconnect immediately. Other errors will exit the program.
The --raw option will disable line-buffering/editing and immediately send everything you type in the terminal.
See tycmd help monitor for other options. Note that Teensy being a USB device, serial settings are ignored. They are provided in case your application uses them for specific purposes.
Reset and reboot
tycmd reset will restart your device. Since Teensy devices (at least the ARM ones) do not provide a way to trigger a reset, tycmd will instead start the bootloader first and then issue a reset without programming anything.
You can also use tycmd reset -b to start the bootloader. This is the same as pushing the button on your Teensy.
Hacking TyTools
Start by cloning the git repository:
git clone https://codeberg.org/Koromix/rygel
cd rygel
Build on Windows
You can use MSVC (≥ 2019) or MinGW-w64. I have not tested Clang on Windows yet. The historical MinGW toolchain is not supported.
Only 64-bit builds are supported, 32-bit builds are not supported anymore.
If you don't have Qt, only the libraries and command-line tools will be compiled. There are two options to enable Qt in TyTools:
- dynamic Qt build: Easiest option, you only need to install the pre-built Qt DLLs for your compiler with the official Qt installer. The binaries need the Qt DLLs to work.
- static Qt build: Harder, but will produce autonomous binaries. Follow the Qt instructions in the felix README to proceed.
Once Qt is ready, launch VS2019 x64 Native Tools Command Prompt, navigate to the project directory and run the following commands:
bootstrap.bat
felix -pFast tycmd
felix -pFast tycommander tycommanderc
felix -pFast tyuploader
If you want to build debug binaries instead, just use: ./felix <target>
Build on macOS
Install Xcode and the developer command-line tools. The native Clang compiler can build TyTools.
If you don't have Qt, only the libraries and command-line tools will be compiled. There are two options to enable Qt in TyTools:
- dynamic Qt build: Easiest option, you only need to install the pre-built Qt DLLs for your compiler with the official Qt installer. The binaries need the Qt DLLs to work.
- static Qt build: Harder, but will produce autonomous binaries. Follow the Qt instructions in the felix README to proceed.
Once Qt is ready, you can build TyTools by executing the following commands in the project directory:
./bootstrap.sh
./felix -pFast tycmd
./felix -pFast tycommander
./felix -pFast tyuploader
If you want to build debug binaries instead, just use: ./felix <target>
Build on Linux
TyTools can be built with GCC or Clang.
Prerequisites
To install the dependencies on Debian or Ubuntu execute:
sudo apt-get install build-essential libudev-dev qt6-base-dev
On Arch Linux you can do so (as root):
pacman -S --needed base-devel udev qt6-base
Compilation
Open the project directory in a terminal and execute:
./boostrap.sh
./felix -pFast tycmd
./felix -pFast tycommander
./felix -pFast tyuploader
If you want to build debug binaries instead, just use: ./felix <target>
License
All the code related to these programs is under public domain, you can do whatever you want with it. See the LICENSE file or unlicense.org for more information.